Think we’ve all seen videos where Harrison has posted a LiDAR data set, using a cool feature of a virtual flyby. The “cool factor” is off the charts compared to a static image…SO…
Harrison, can you share with us how you pull off this super cool feature?
It is a huge pain TBH. Hopefully a better solution comes. But see below for a crude workflow:
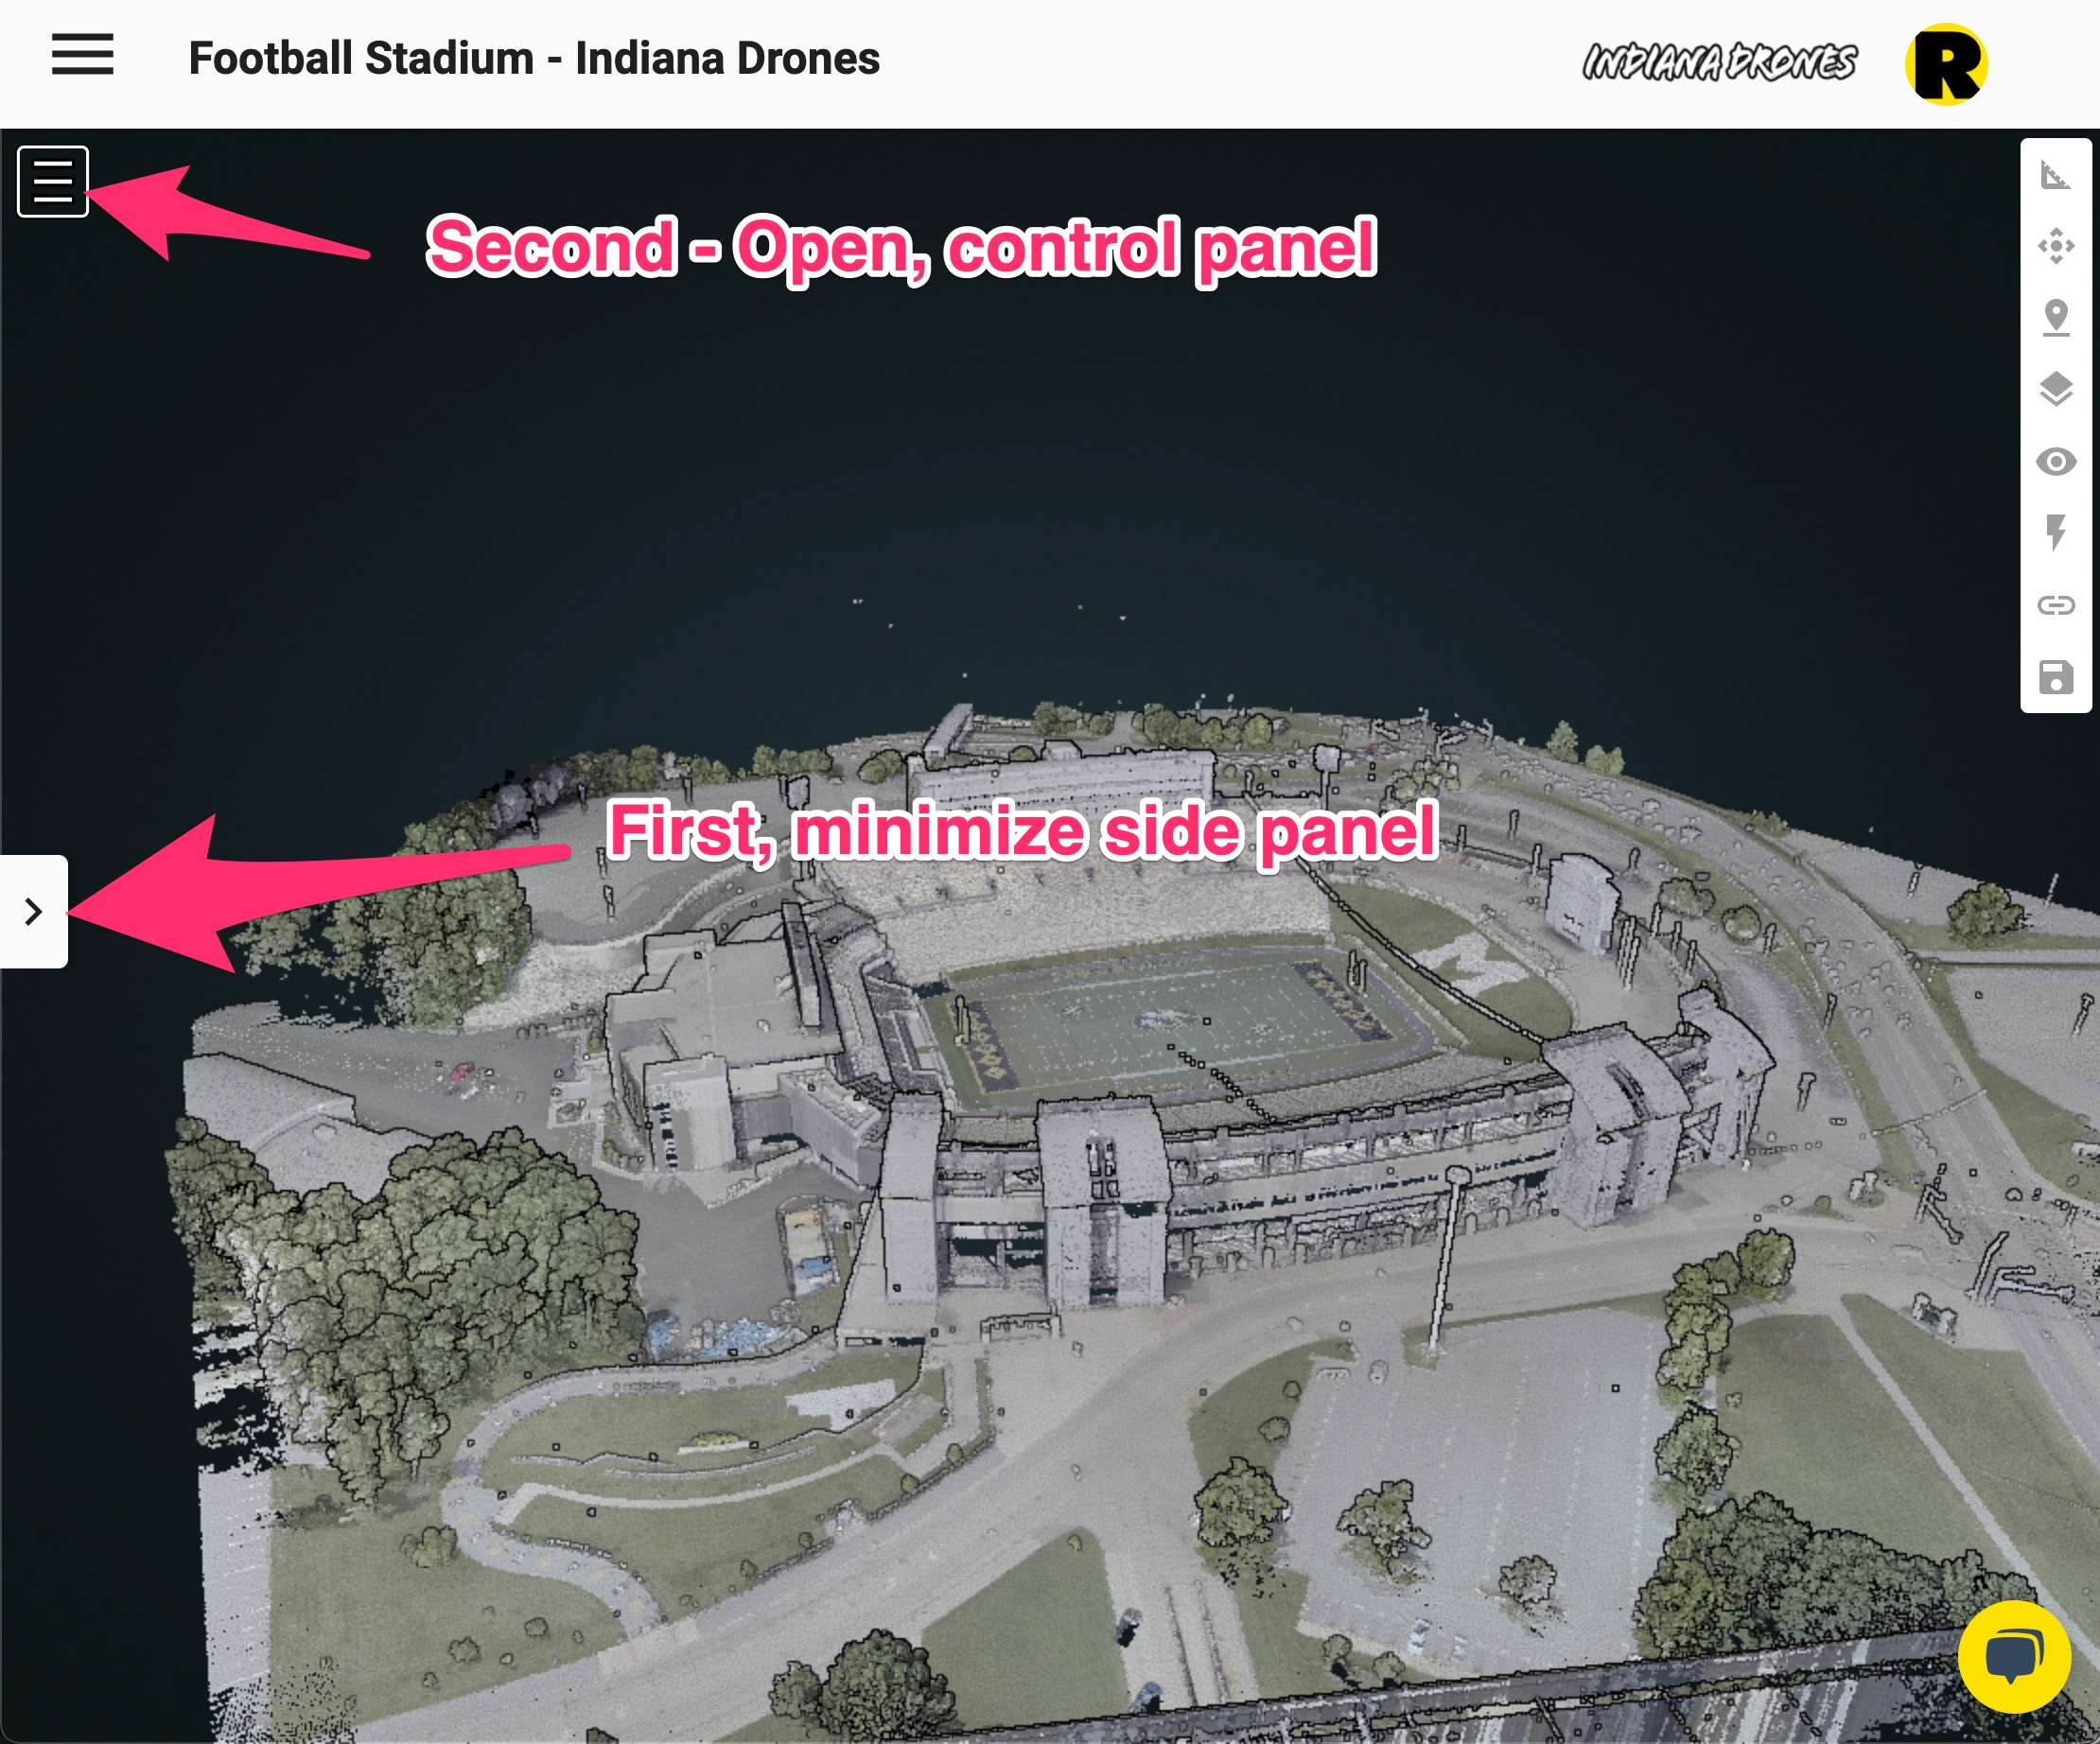
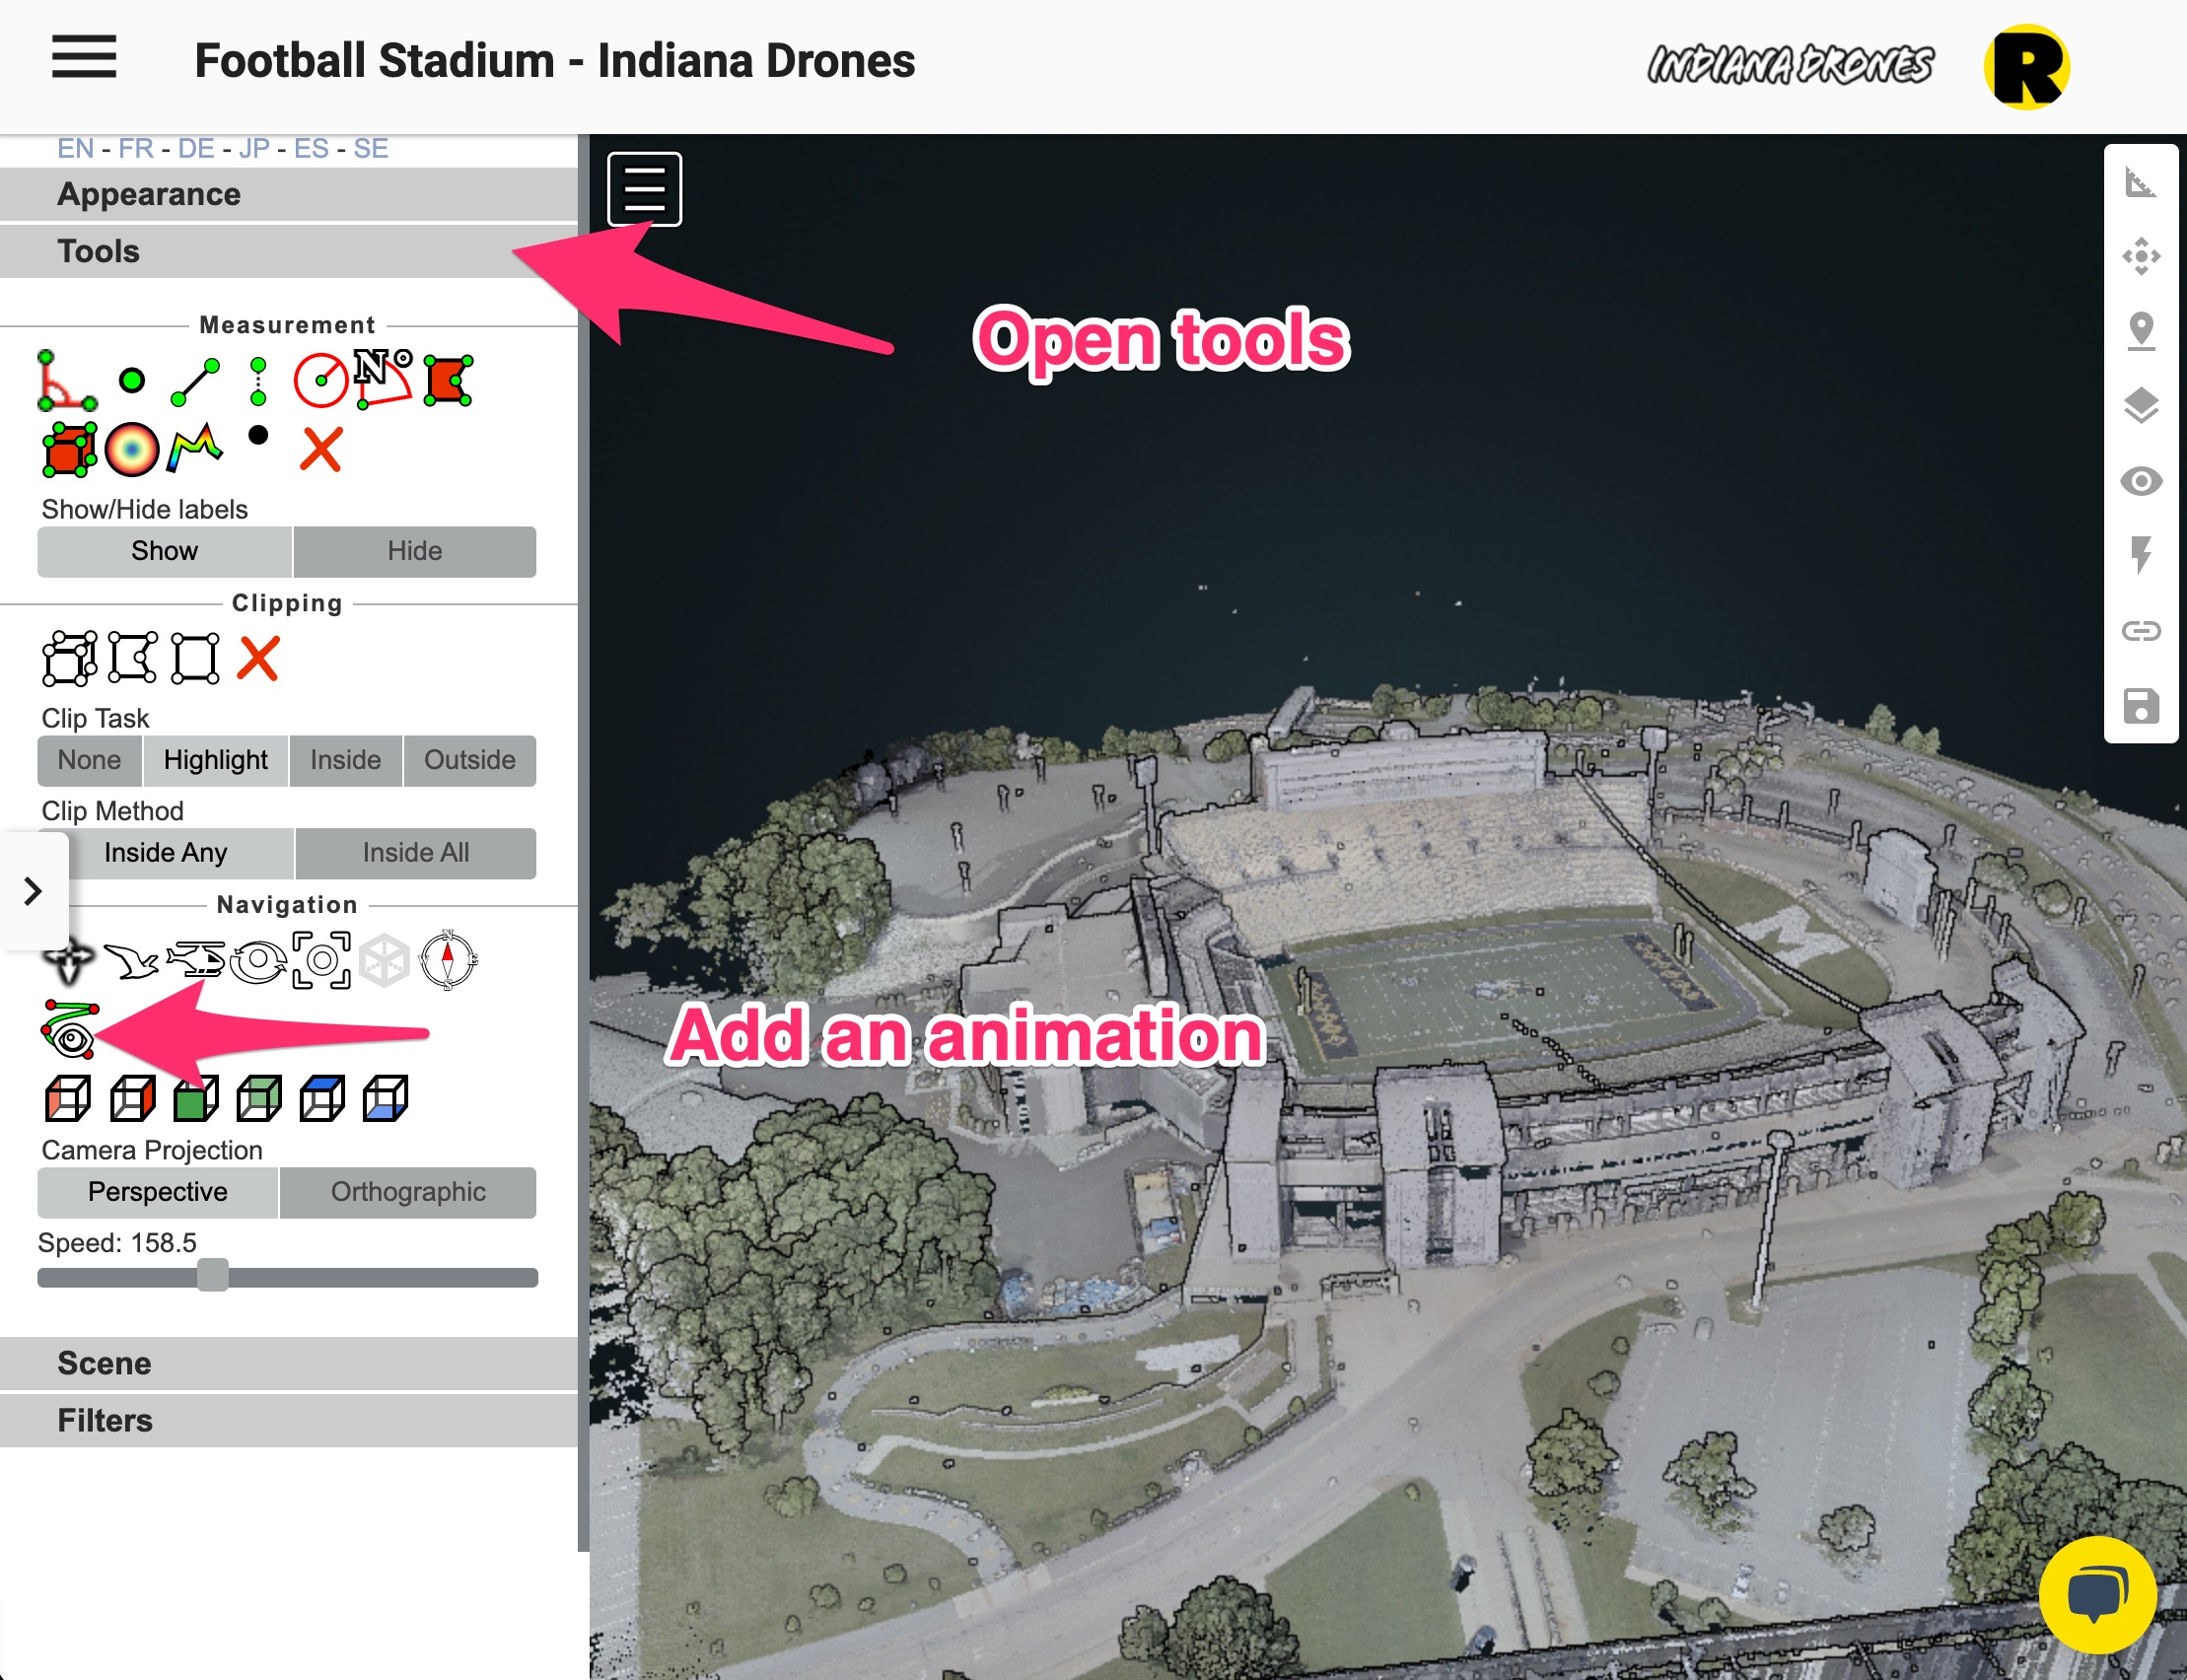
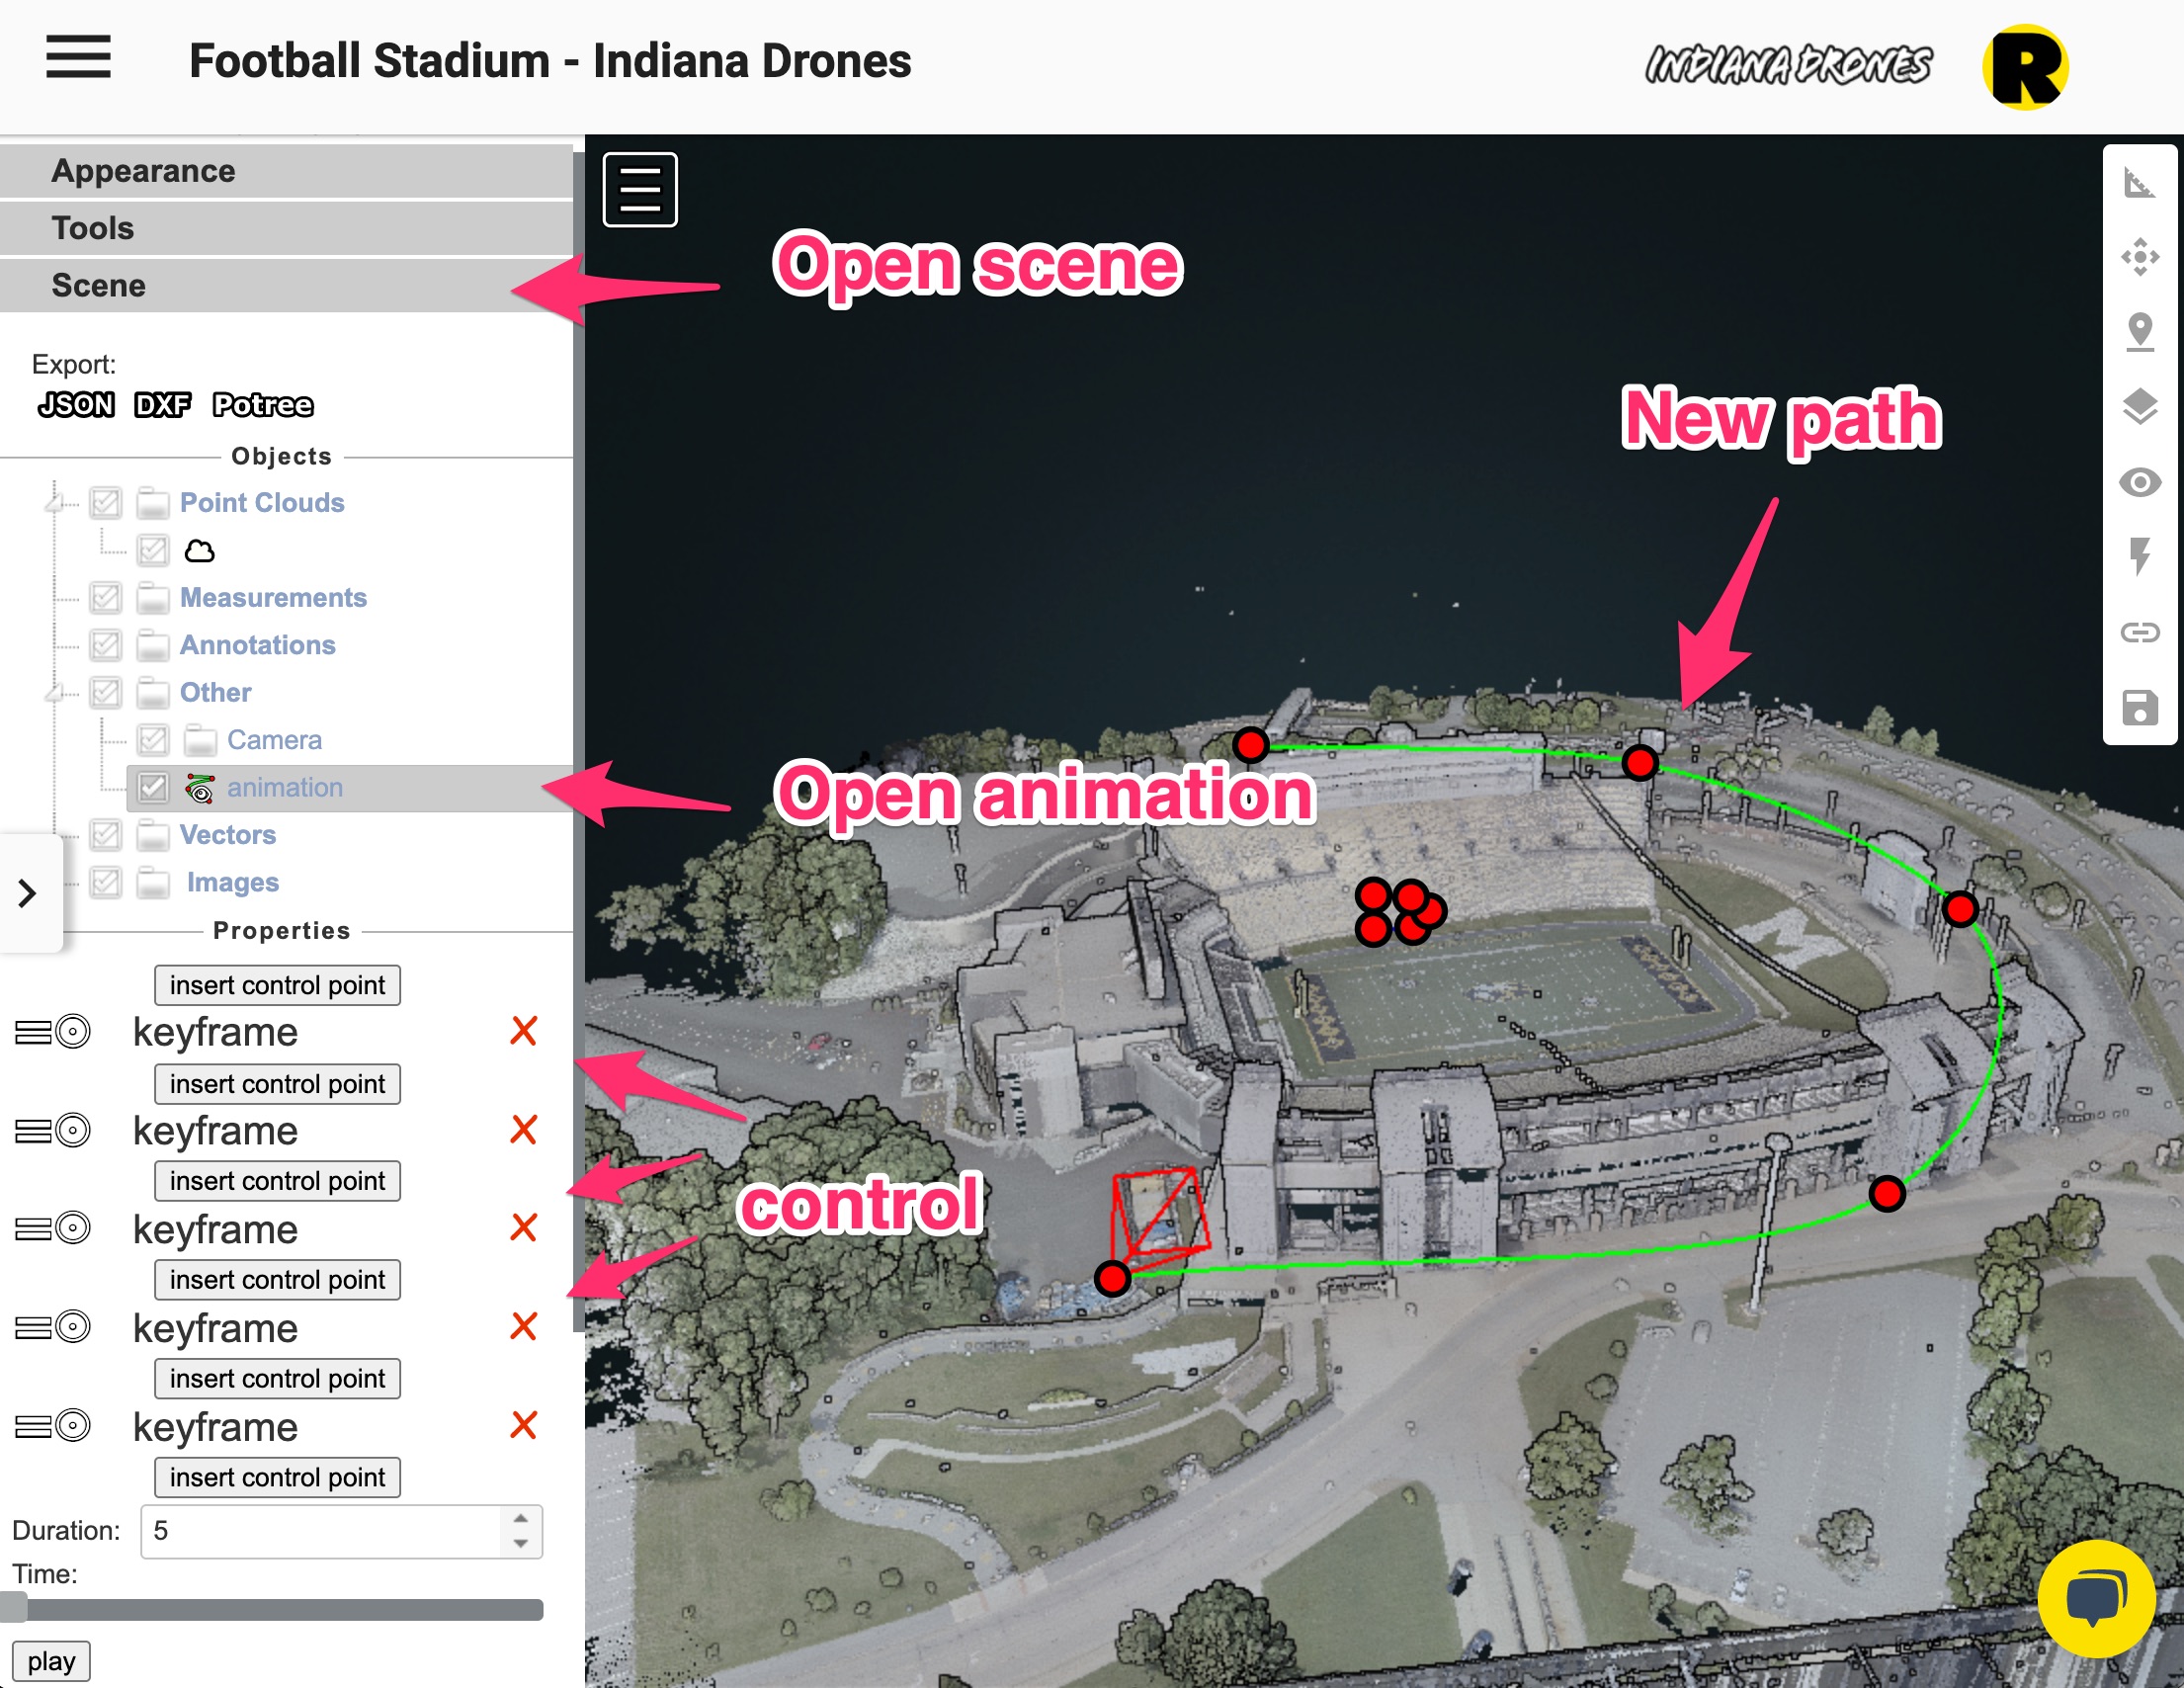
I use the camera animation tool located in the left corner of LiDAR screen (after you close the left properties window, you will see a new button at the top left.)
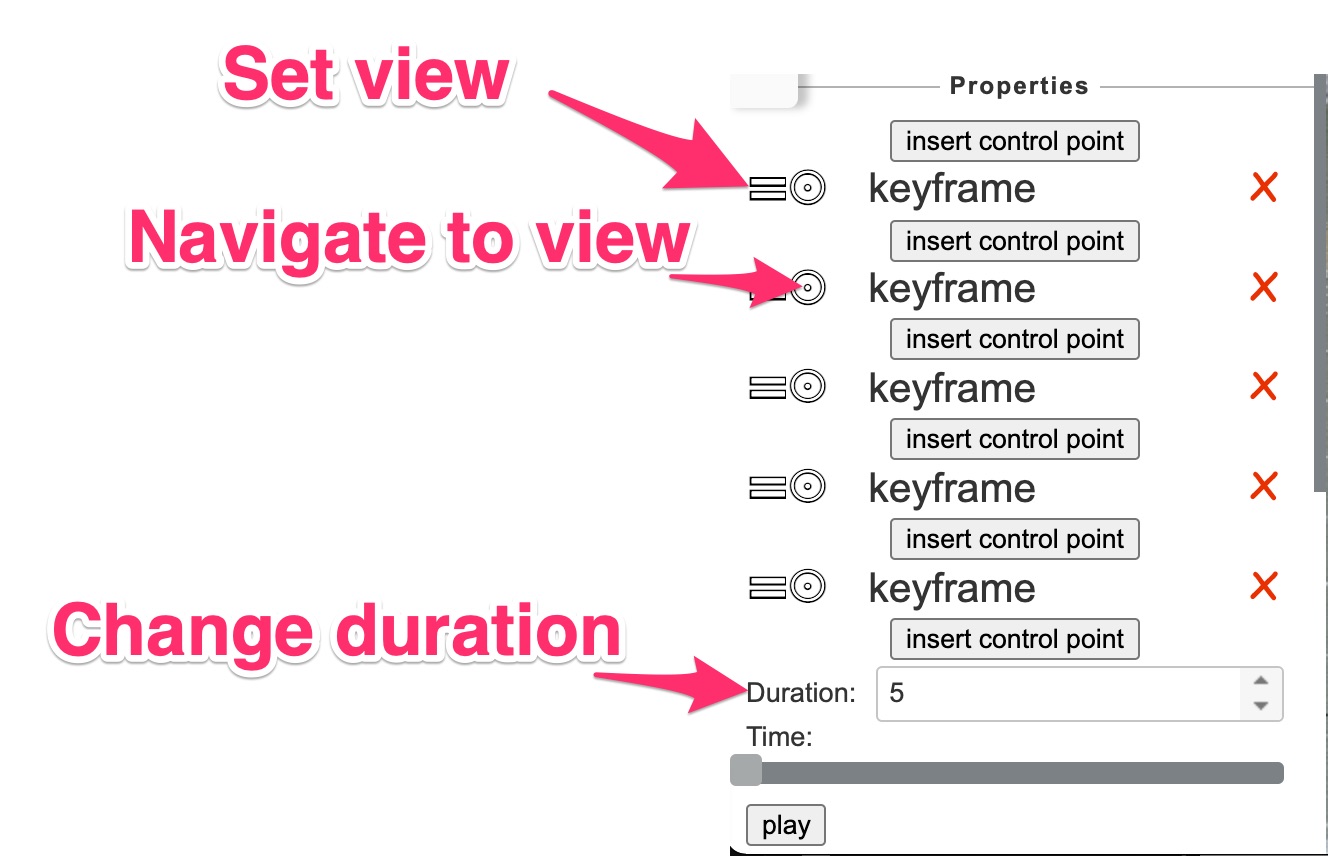
Then I use the incredibly cumbersome animation tool to “fly” a path. you will want to learn to click “SAVE” every time you make a desired change because eventually Chrome will crash on you.
Then take multiple screen recordings and then import everything into Final Cut. From there I use editing techniques to line everything up and then adjust layers and what not. Like I said, not very simple to be honest. The worst part is the animation tool. While it is awesome, it just isn’t easy to use at all (at this time). Maybe @Harrison has some insight if we will ever see a built-in animation tool and movie export function?
The following was shot a few days ago with the DJI L1:
Then you need to cut the video together using a NLE such as premiere of any other video editor. You could do a good job at getting a 1 - shot video record