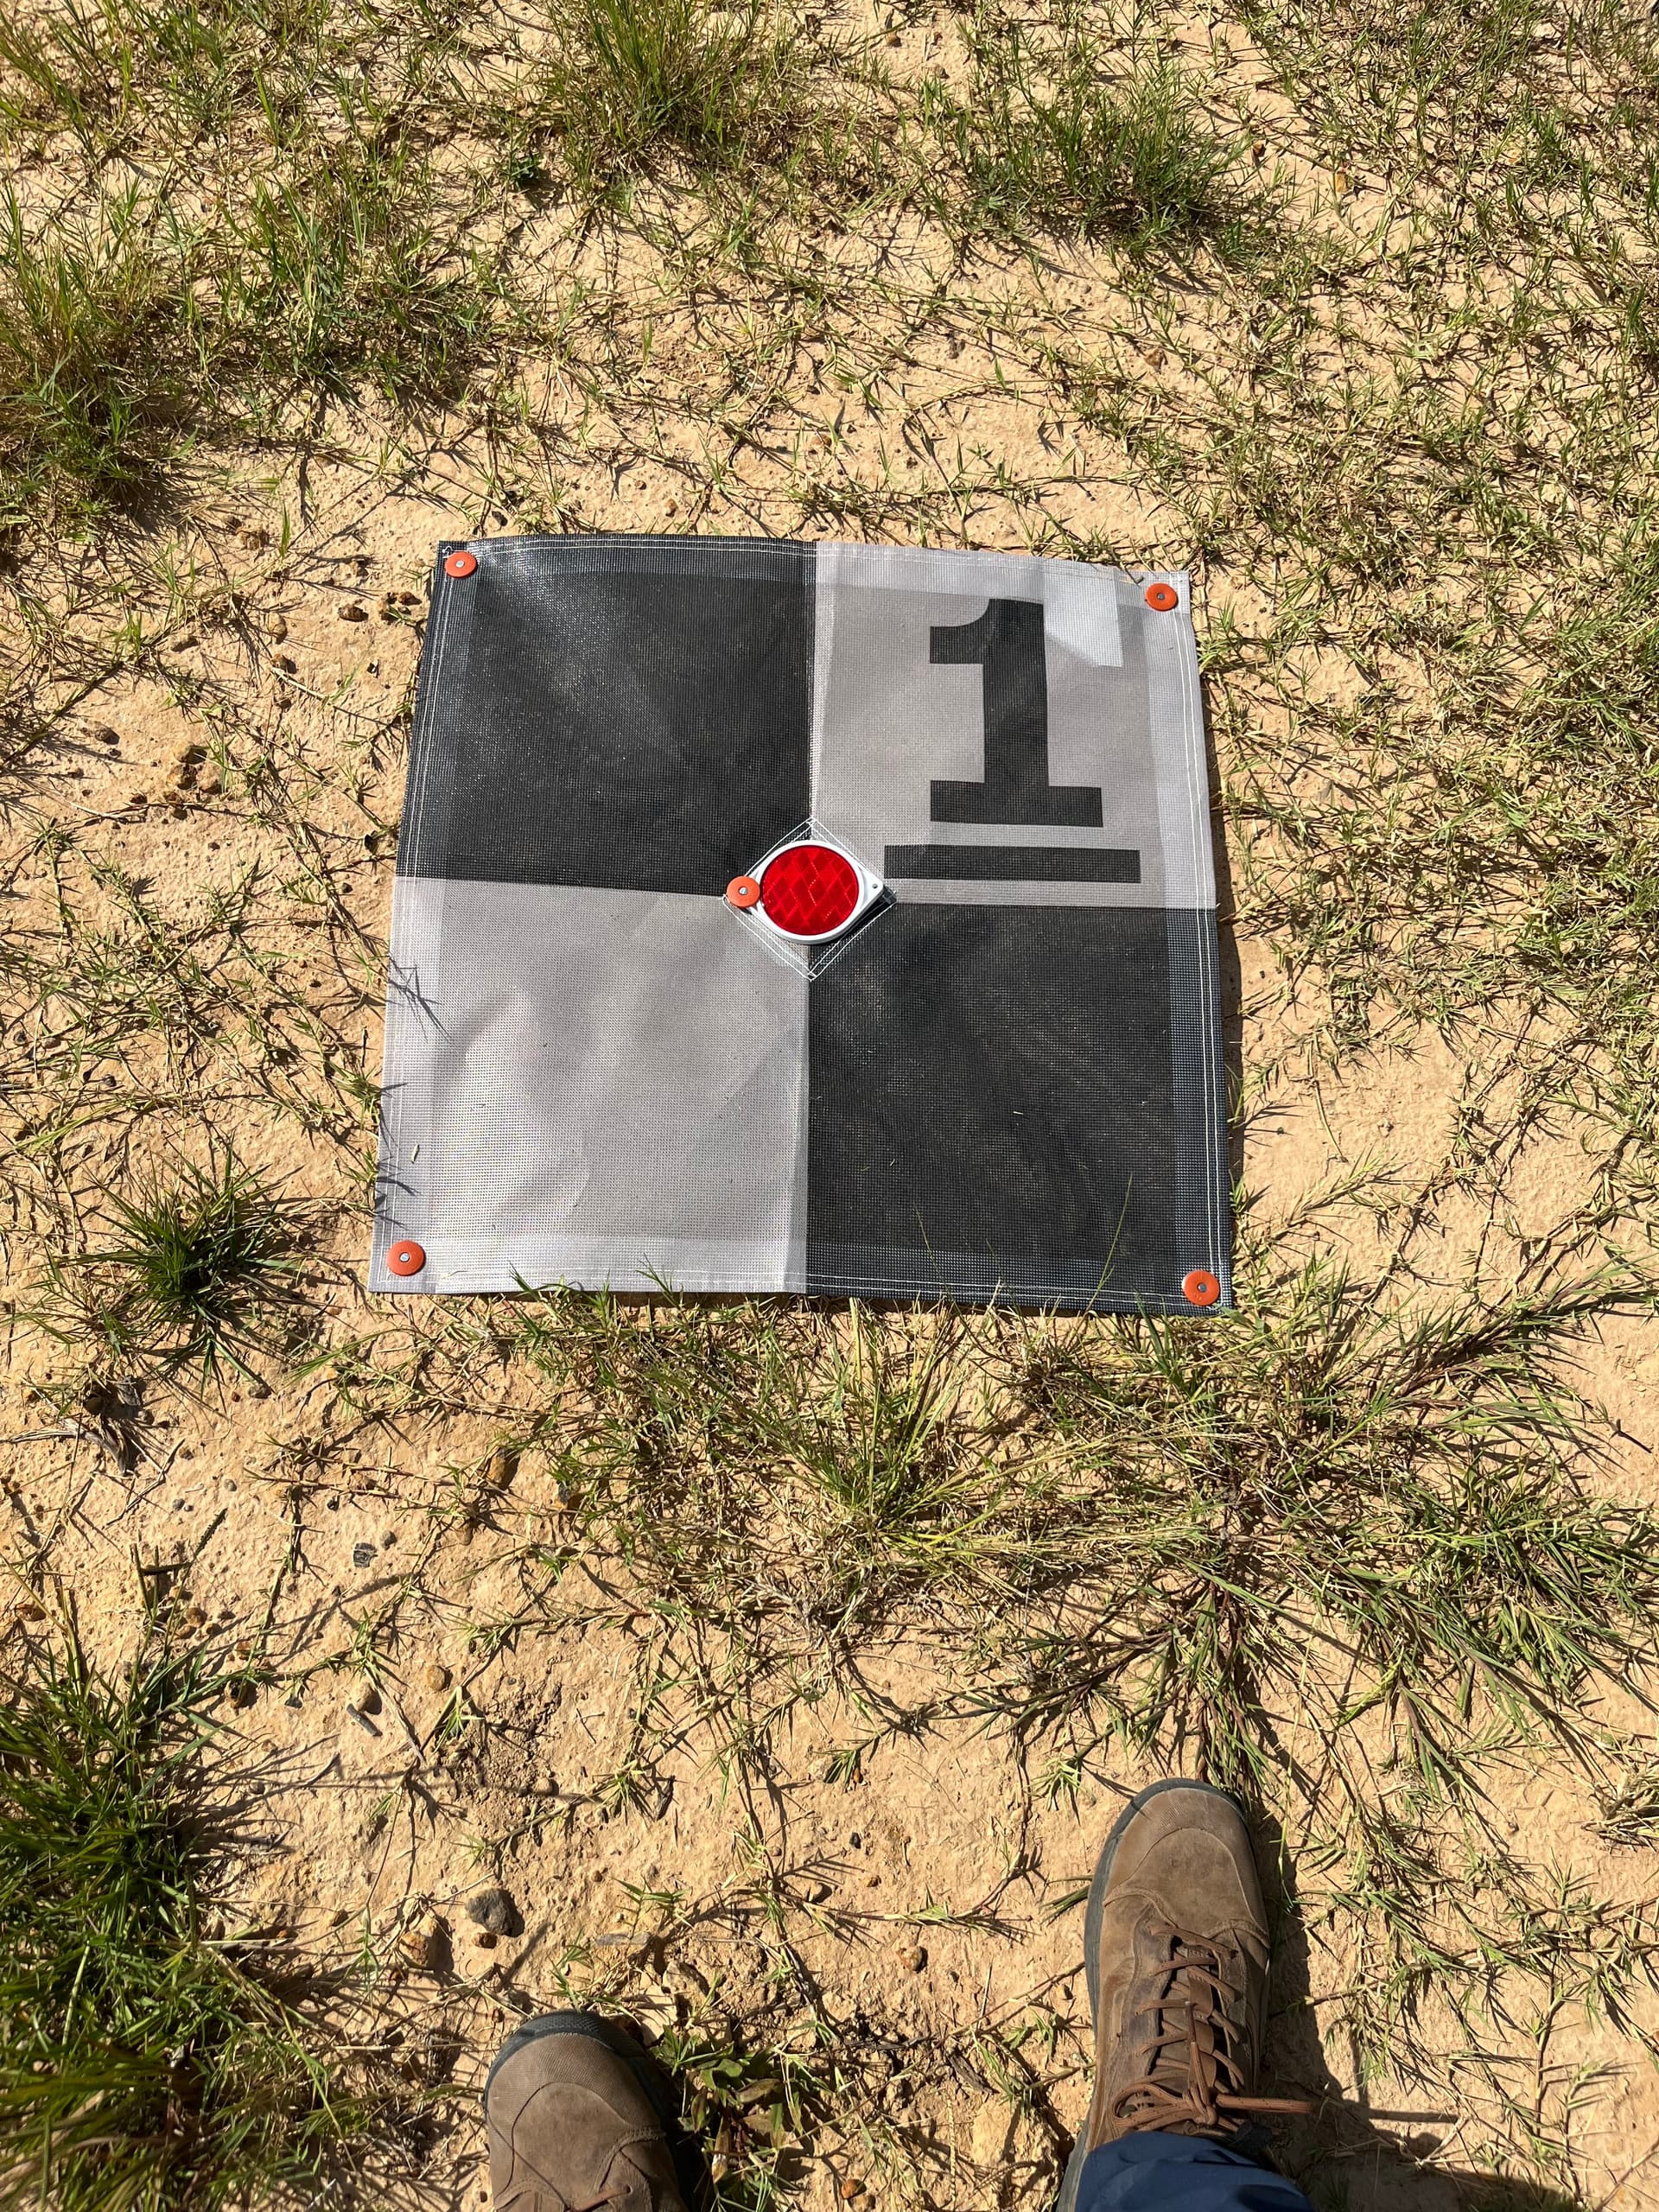
We use black and white square targets, but often if we’re flying over asphalt or concrete we need to paint a chevron on the ground to use as a target if a material target is not an option.
What paint have people been using that shows up well in intensity view? We’ve tried a few different ones and are currently using an inverted striping paint from Home Depot, but I wanted to hear what everyone else was using.
Can you post some result screenshots? I typically just use the existing striping unless it’s really degraded. This is a great question!
Sure!
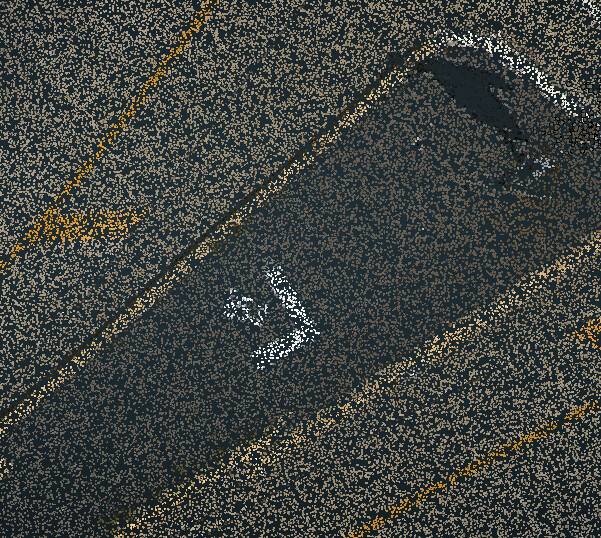
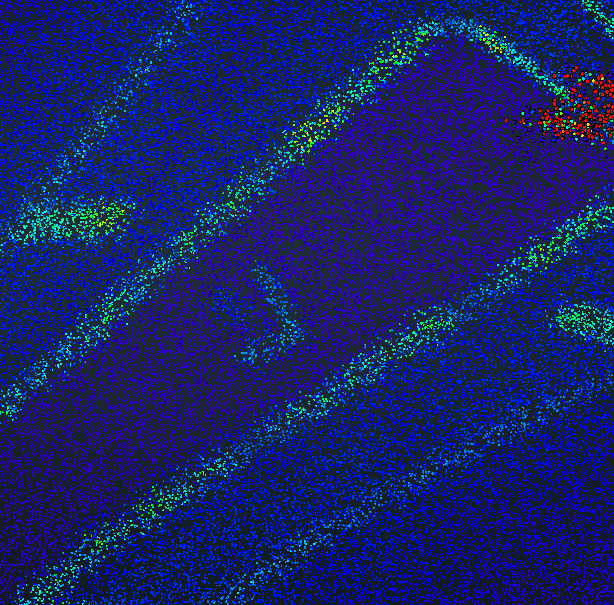
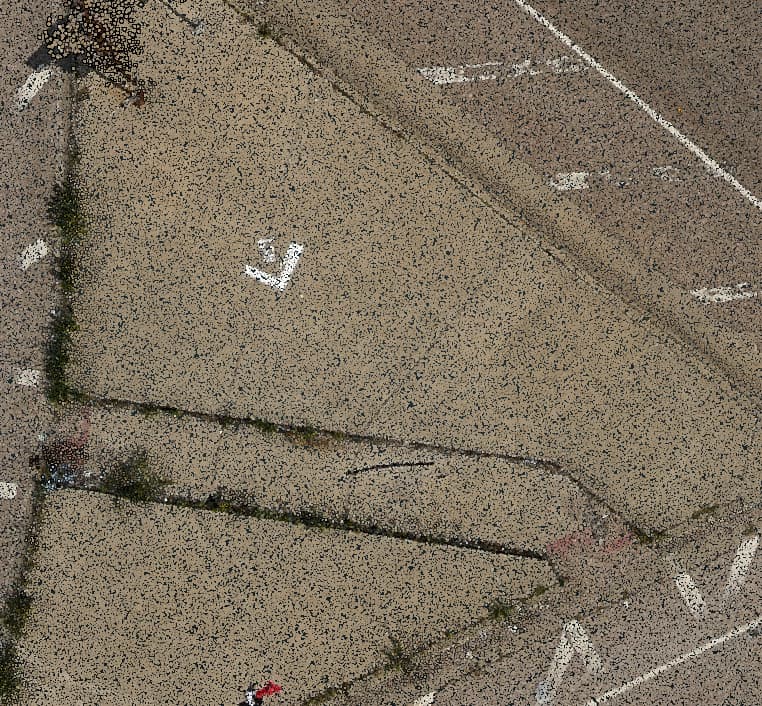
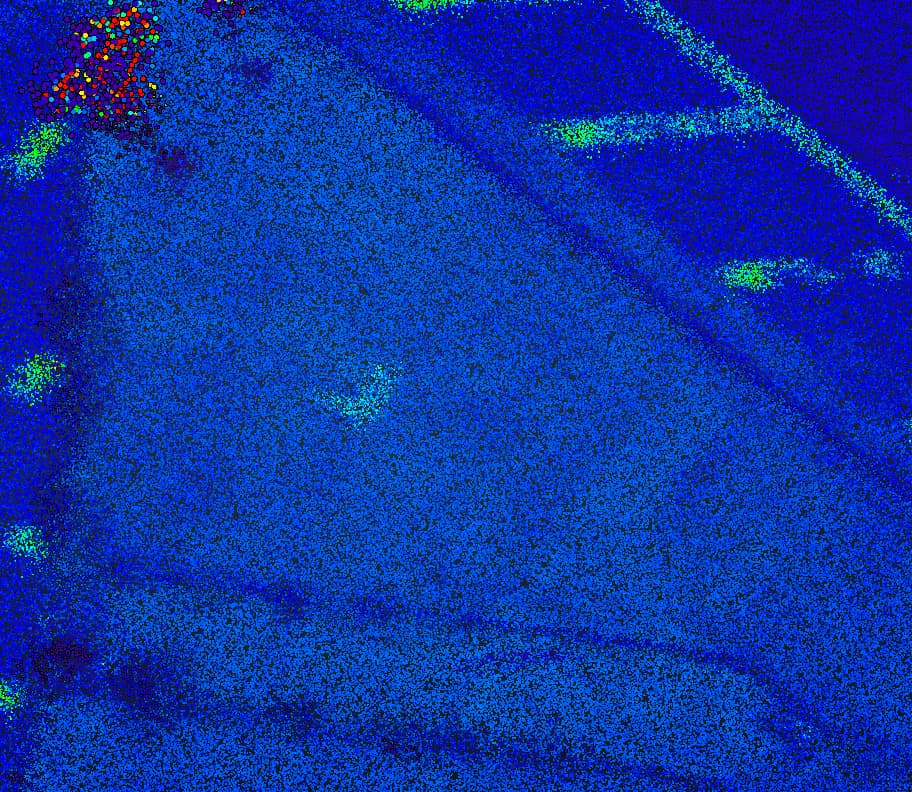
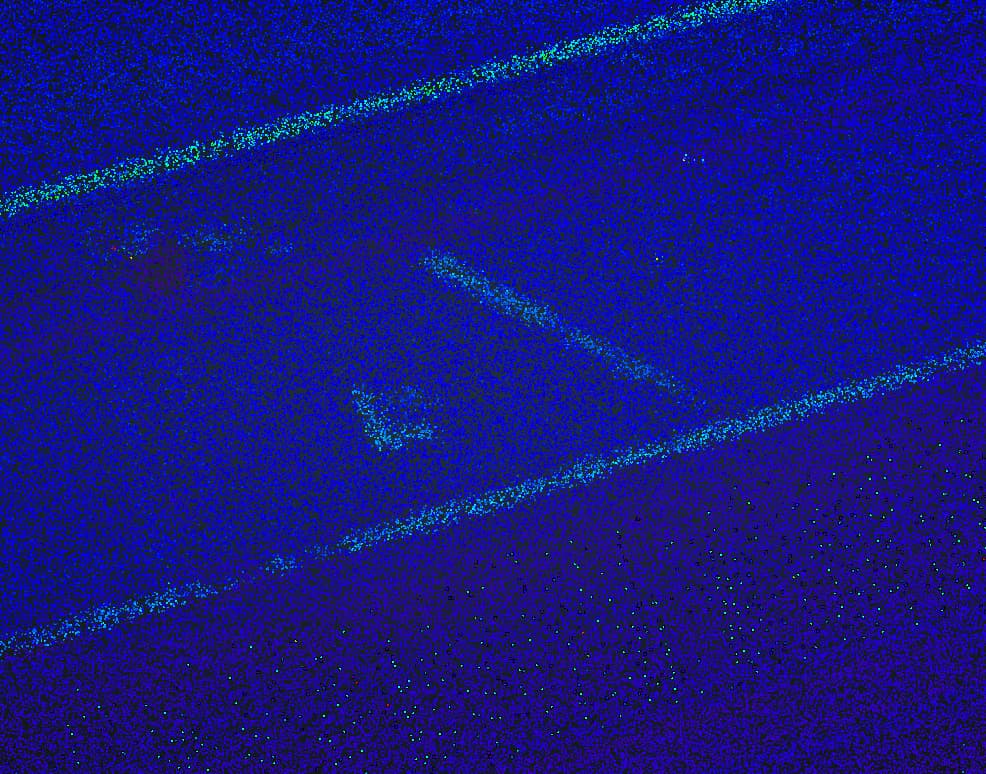
Here are some sets of Chevrons we painted. I’ve included the RGB view as well as intensity gradient.
When we have someone else processing the flight that wasn’t on site, I prefer Chevrons/standalone targets as there is no confusion as to which paint stripe or corner was used and allows us to space them how we want for the coverage. I know it adds a little time but it gives us greater control.
What we’re using is coming in alright, but if there are different paints that people are using I’m interested to hear.
Excuse the misaligned RGB data in this pair. I’m not sure what happened.
We use a survey grade marking spray paint (water based).
Orange works well.
Contrast is good.
Alternatively, we use 4’x4’ white puck boards. Glows like a candle in a dark room.
1 Like
Thanks! We tried orange but had no luck in intensity view, but perhaps it was the wrong type of paint.
Chatting around the drone battery charger today, and this topic was discussed…
I was reminded that the paint was left behind because the hard white targets are so much better and way more visible.
Unless you paint has reflective properties? I know the street line painting that is frequently spec’d in my part of the world contains reflective (miniature glass beads) properties. But I don’t think you can get that in a spray bomb!
That’s a great point. We’ve found a half decent spray can that works with this and seems to reflect well in intensity.
One of our issues is we can’t always use hard targets or set things out (ie, roads, sidewalks) and sometimes we have to set targets the day before we fly and can’t always leave hard ones out.
Where do you locate the control point on the puck board? Do you shoot the approximate middle and call that the GCP?
Hey @Jonrowsell Is this a dataset you can share in here? I am wondering if we play with the intensity color scale on the side, can we make the edges of the chevron pop a bit more.
My puck board GCP, about 4’x4’, has corners drilled out to accept 10" spikes. The puck board has limited ability to conform to irregular surfaces and I’ve yet to encounter a scenario where I am unable to place useful targets. The awesome beauty of the lidar is in the point cloud, which moves as ONE unit… so if you can’t get control to every corner, a few points you do have, works brilliant!
Now, from my corner nail holes, we drilled tiny little holes to accept the tip of the survey rod (consistent measurements). We shoot all 4 corners.
When you are in QA/QC, the targets and the 4 corner shots glow well. They need to match. Its amazing how close/accurate you can get. I recently had to move a data set 4mi (6.4kms for the rest of us) because I dumb fingered in the base station data, and I was able to move my whole data set to the targets, perfect. It does work… Keep in mind, running topo survey in the prairie is NOT building a piano or establishing the 0.002% grade of the asphalt from some silly development. IF that was the case, we would re-run the data over and over.
Harrison, I can shoot you a link to the data, no problem!
Try backing the white chevron with Black pain. In other words spray black around the edges first, what a minute or two then spray the white.
Additionally, pink and green are the colors Aerotos uses for their targets, and I find the contrast is great (try green and pink inverted pain available at many locations).
I often use the 12"x12" black and white adhesive tiles with a hole drilled in the middle to fit over the tack/nail… These can be stuck right to the asphalt or concrete or attached to a thin sheet of wood to make them more durable and easily reusable. – The contrast of the tiles can washout in the images at certain angles due to the reflection of the sun.
1 Like
I like this idea when using paint. I think contrast is ultimately key. Black paint outlining the white paint would be ideal. For targets I can place I have used things like this as well.
1 Like
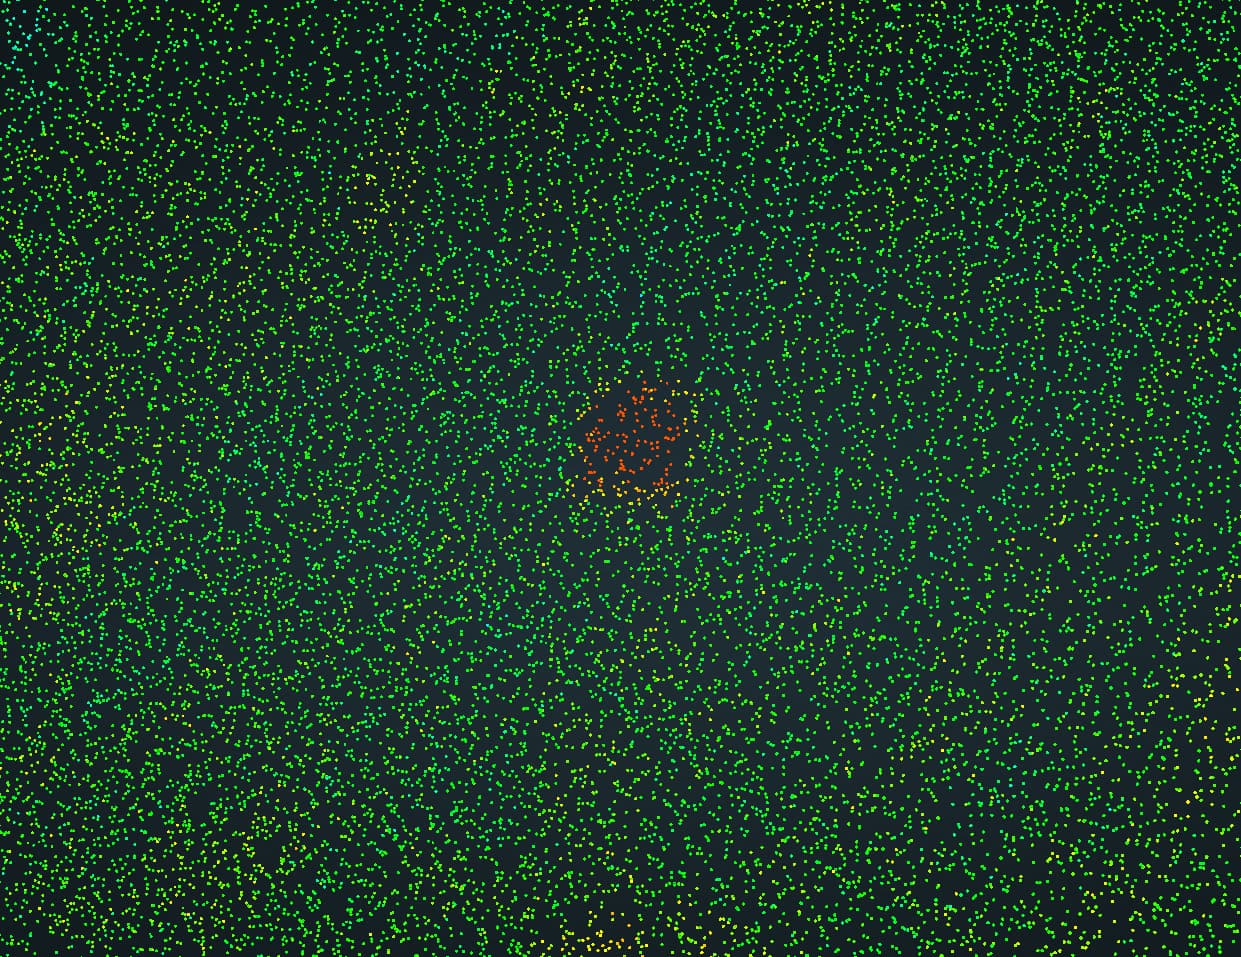
How does the reflector look in Rock Cloud Intensity Gradient?
It can be rather noisy, I would like to test different types of reflectors in order to find the precise center for flights that require higher levels of accuracy. For my use case I am flying higher and faster than most for surface capture. For us they work just fine.